

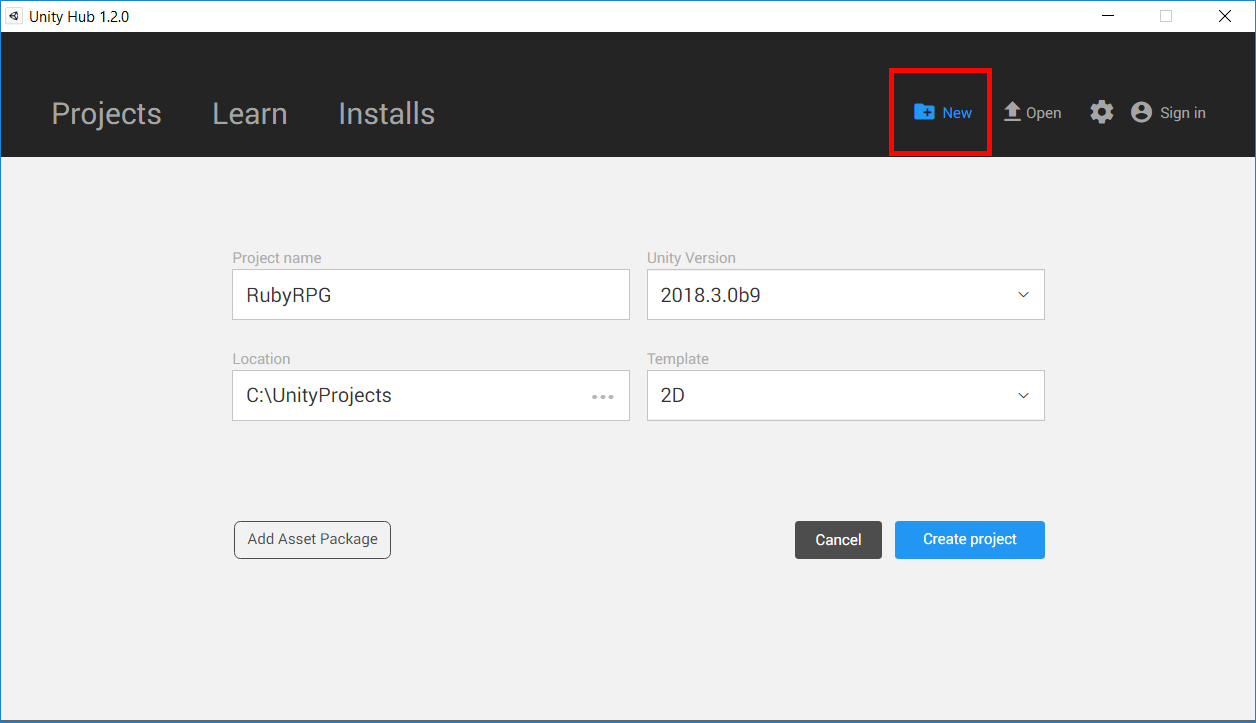
Creating a ProjectTo create a new Project for your game:
1. Open the Unity Hub.
2. Click the New button in the top right corner.
3. Enter a Project name.
4. Set the Unity Version to 2019.1.
5. Choose the folder where you want to save your Project.
6. Set the Template to 2D.
7. Click Create project.
. Set the Unity Version to 2019.1.5. Choose the folder where you want to save your Project.6. Set the Template to 2D.7. Click Create project.
Unity Editor interface
Let’s run through the Editor first. Don’t worry, you don’t need to remember every detail! This section will give you a broad idea of what each window does, so when you explore the Editor more in detail, you know which part of the screen to look at.
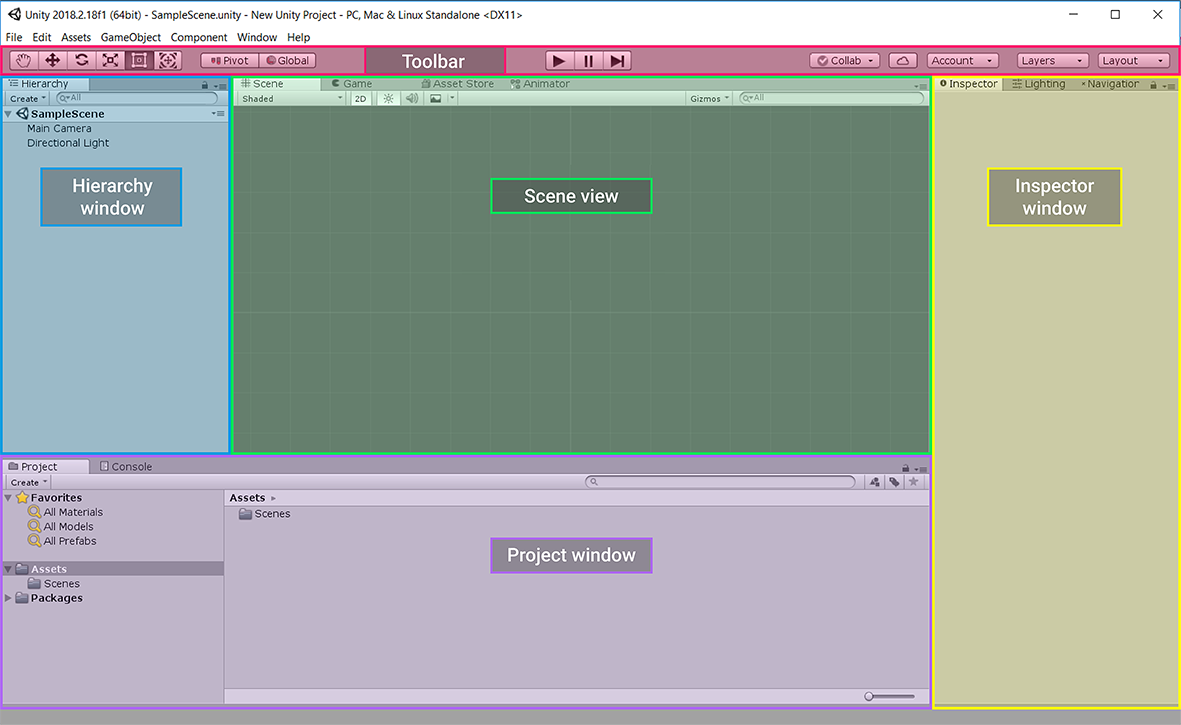
Project window
The Project window lists all the files and directories in your current Project. These files include all the images, sounds and 3D models used in your Project. They are collectively known as Assets.
- Open the Demo folder and double click on DemoScene. This will open a Scene for you to use as a demo for the rest of this tutorial.
Console window
The Console window shows you the warnings and errors that you game is producing, which gives you useful information for how to fix those errors. By default, the Console window tab is next to the Project window tab. You can move it by dragging and dropping the Console tab to dock the window next to the Project window.
Hierarchy
In Unity, your game is made up of Scenes. Think of a Scene as a Level in your game or a different environment. Within every Scene you have a list of objects that have a place within that Scene. These objects are called GameObjects in Unity.You can place GameObjects in a hierarchy structure of parents and children. GameObjects can be children of other GameObjects, allowing you to move them in groups (if a parent moves, all its children move with it). The Hierarchy window shows all of the GameObjects in your Scenes with the parent/child relationship displayed.
Scene view
The Scene view is a live preview window of your currently loaded Scenes and all the GameObjects in the Hierarchy view. You use it to place and move GameObjects in your Scene. Clicking on a GameObject in the Scene view will highlight it in the Hierarchy.
Game view
The Game view is the view that will display when you test the game inside the Editor.The Game view is by default hidden as a tab next to the Scene view. Whereas the Scene view allows you to move GameObjects and look around your entire Scene, the Game view shows you what the player will see when they play the game, which is just the part that the camera sees (this is shown by the white square in the Scene view).
Inspector window
When you select an item in the Hierarchy or Project view, the Inspector displays all of the data relating to that item.
For GameObjects in the Scene, the Inspector shows data about that GameObject. Unity uses an Object – Component model, which means your Scene is made of GameObjects that you add Component functionality to.
For example, a Sprite Renderer component displays an image at the GameObject’s location in the Scene, and an Audio Source component plays a sound at the GameObject’s location in the Scene.
For Assets, the Inspector displays the import settings that Unity uses. These tutorials will highlight and explain import settings for common Assets in a 2D game.All GameObjects start with a Transform component that allows you to specify its position and rotation in the Scene. All other components are optional and you add them as needed.